Transfer Blog to another Email | Blog email change Process
Blog email change Process: Blogger is a Google product. You can create a blog by a Gmail address. There are two benefits to creating a website in Google blogger. First, free hosting is available for your website & secondly your website security is provided by Google (Google services) itself. You can create many blog sites by one email account.
Blogger vs WordPress which is better for Blogging | How to disable Right Click on Blogger Website
Blog email change Process |Transfer website ownership
If you want to transfer your blog ownership or, transfer your blog to another email. You must follow these steps.
Step1 (add new Email acc)
- Login in your Blogger account (by your Old email account)

- Select your “BLOG” name.
- Go to SETTINGS
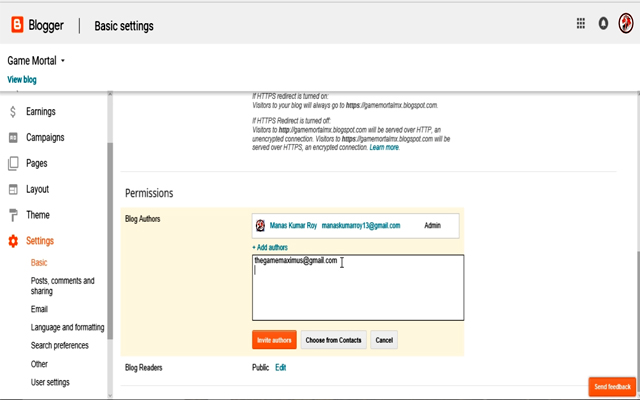
- SETTINGS >> Basic >> Blog Authors
- After that click on “Add Authors” >> give new “EMAIL” name in this box.
*** (That email account, where you want to transfer your blog)
Click on “INVITE AUTHORS”
Step2 (accept the invitation of Blog)
1st You need to create a Blogger account by this New Email Id.
If you have already created a Blogger account through this new-email. Follow the rules below
- Go to another Internet Browser >> open a “New window/ New Incognito window” >> Login by New Email account.
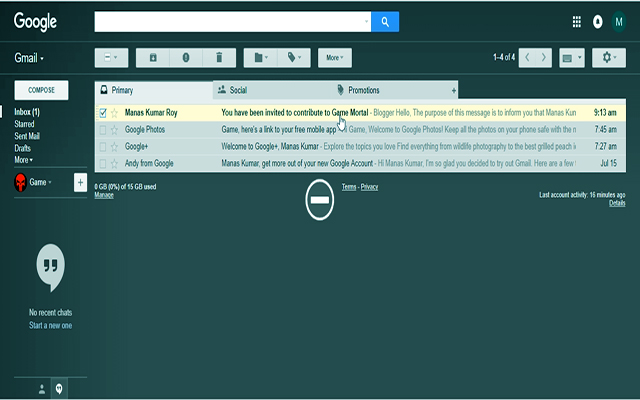
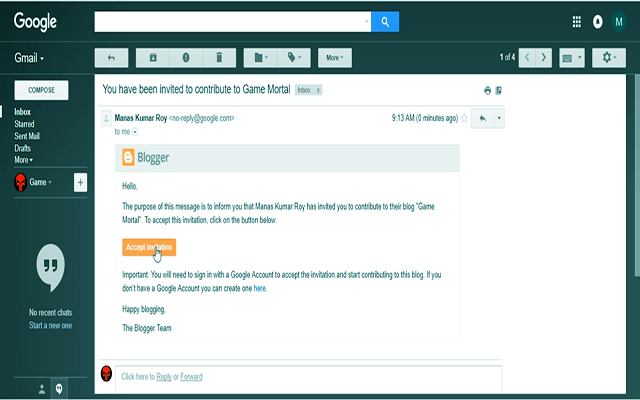
- Open Blogger Invitation message >> ACCEPT INVITATION
Step3 (transfer Admin-ownership to a new email)
When you open the blog with this new email account. You will not see Blogger’s “Complete Settings” in it. Blogger’s “Complete settings” is the only visible for admin account panel. So you have to change the ownership of this blog & make new Email Id as Admin.![]()
After you make another email account as admin, all blogger settings will visible normally. You must follow these steps for these.
- Go to 1st (Old) email >> open Blogger dashboard
- SETTINGS >> Basic >> Blog Author
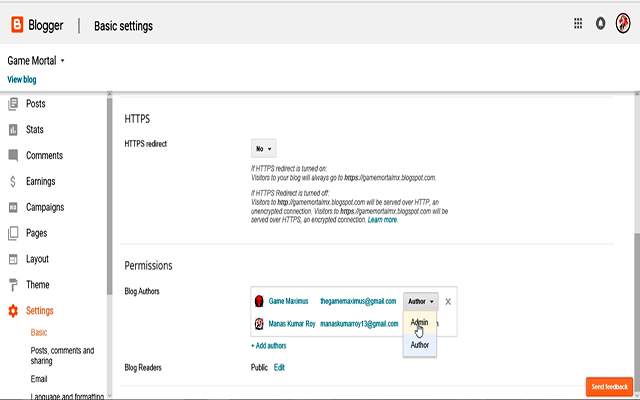
- Select (New) email Id >> Go to Admin option >> Make Author to Admin
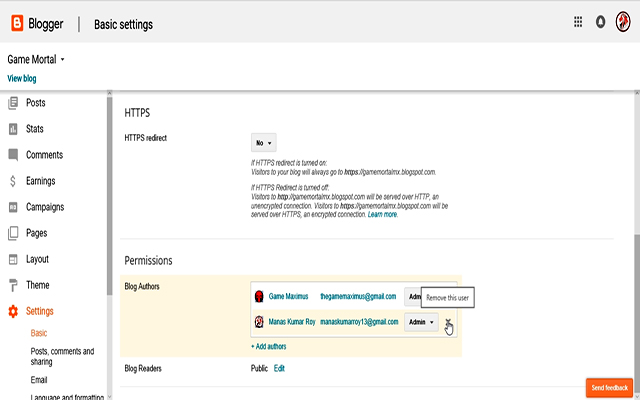
- Select (Old) email Id >> Click on “Remove this user” >> Ok
After this process, Old Email Id will be automatically removed from these Blog user list & Blog will open by “New Email Id”.